Ready to start installing your peel and stick NuWallpaper? We’ve compiled some of our favorite tips and tricks for an easy application. Let’s roll!
1. Check Batch/Run Numbers
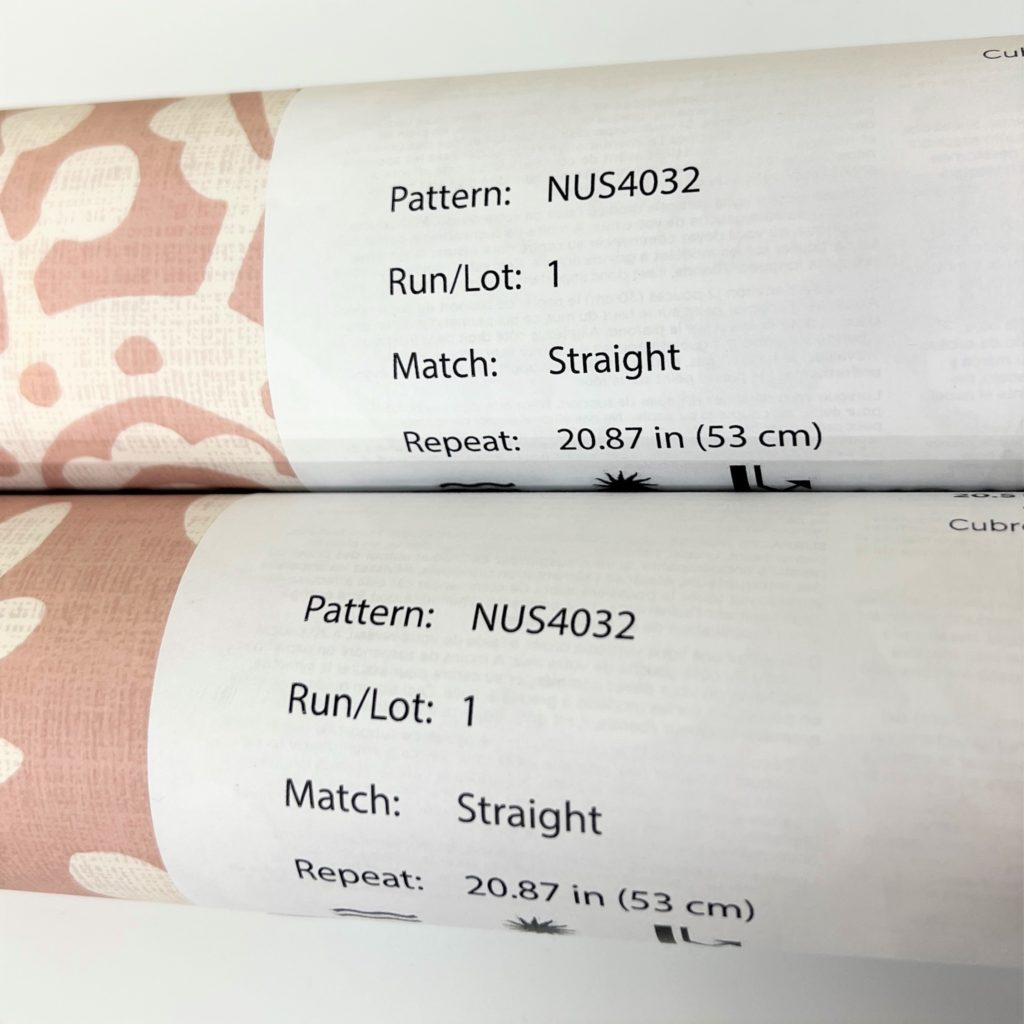
Our biggest piece of advice is to be sure your rolls have the same batch and pattern number before installing; no one wants to find out their prints don’t match after spending time smoothing out on the wall. Check that you are ready to go ahead of time, so that you don’t have to put your project on hold, or worse, start over!
2. Surface Check

Peel and stick wallpaper adheres to smooth, flat, clean surfaces. It is essential that your desired application surface meets those criteria. We do not recommend installing on textured, dusty, freshly-painted, or outdoor surfaces. If you have just painted, wait at least 4 weeks before installation to allow for the proper curing of the paint.
3. Acclimate Your Product
For at least 48 hours before installation, be sure to let your NuWallpaper acclimate to the environment in which it will be installed. This allows for the material to adjust to the climate of your space before you install, leading to a smooth and uniform application. No one wants shrinkage or mystery bubbles!
4. Get Completely Clean
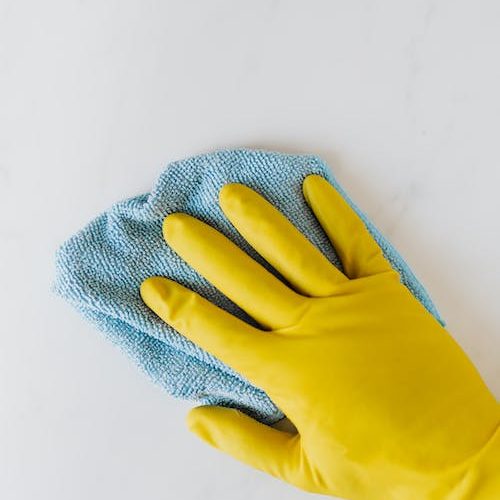
Wipe off dust and dirt with a damp cloth to ensure a clean landing pad for your NuWallpaper, ensuring proper adhesion. Leaving behind dust or debris may inhibit the success of your installation, so this is vital. Though our wallpapers are designed to stick well and remove easily, they do still need to adhere properly to do just that. This is a great step to take while letting the product acclimate – multitasking for the win.
5. Clear the Space
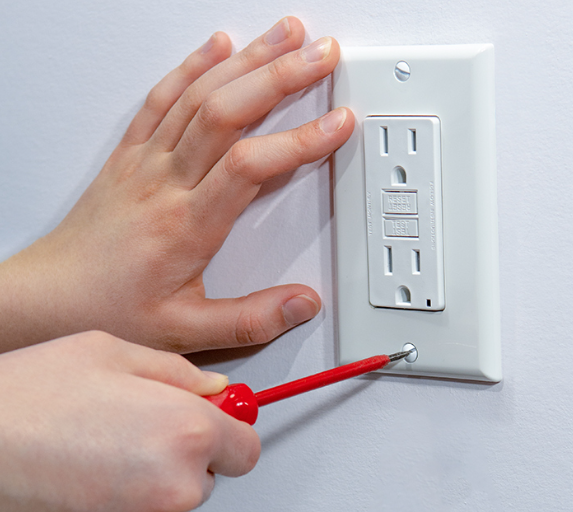
It does not have to be an obstacle course! Clear the space of unneeded clutter, outlet face plates (turn off power first!), and ensure you have room to walk around and complete the project without tripping or getting stuck to surfaces that are not where the paper is going.
6. Helping Hands
Have someone help you install in tricky spaces. Powder rooms, areas with lots of moulding or curves, and ceilings are tricky when there are only one set of hands working with the product. Though it’s totally doable, it is definitely easier to keep the paper straight and wrinkle-free when it is a team effort.
7. Line It Up
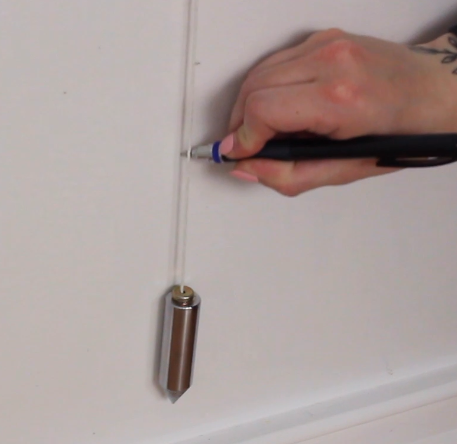
For a seamless application, we recommend starting with a plumb line for the first strip 20 inches away from the left-hand edge of your wall. This should be done with a plumb bob or a level so that the line is straight; this is the backbone of the rest of your installation, so take your time and get this one right, and the rest will be a breeze.
8. Gravity: It’s Your Friend.
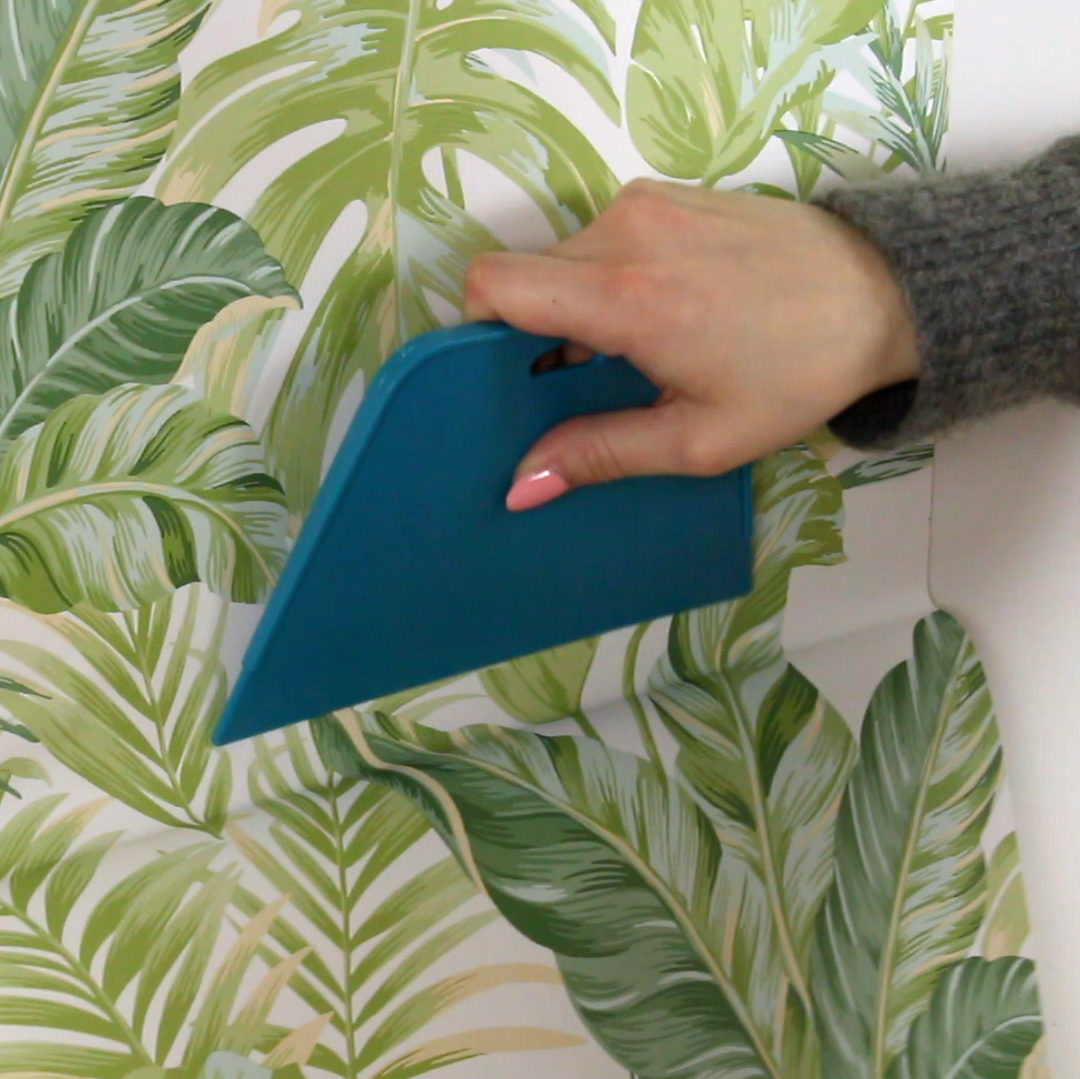
Gravity doesn’t quit for anyone (except astronauts, maybe). Use it to your advantage and take your time with installing. No need to pull and potentially stretch the material, just let gravity do its thing as you unroll and keep smoothing.
9. Straightedge, Straight Cuts
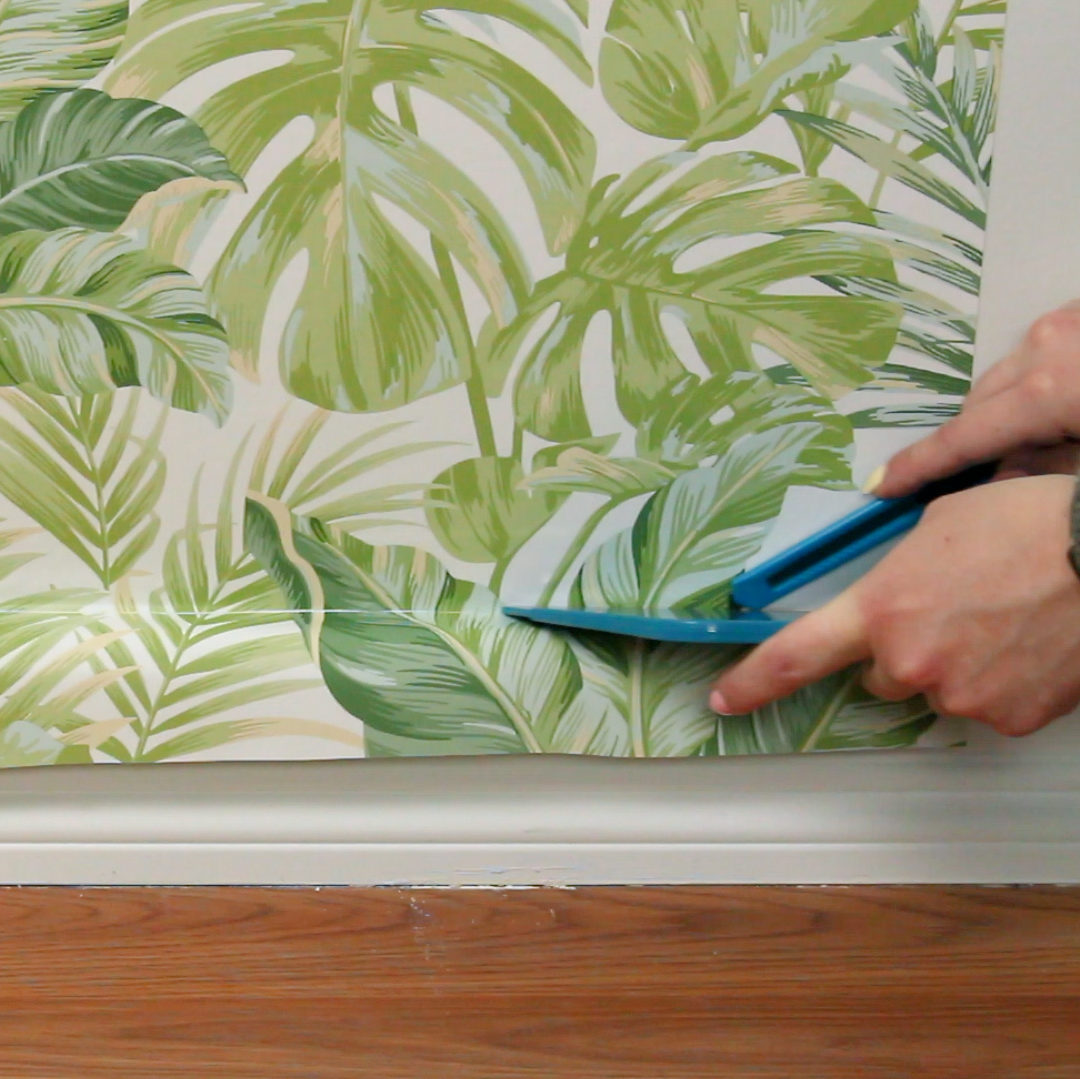
Once your NuWallpaper has been installed and it is time to clean up the edges and cut away excess, use a straightedge or a ruler as a guide for your knife, ensuring straight, clean cuts.
10. Keep It Clean
You can clean your NuWallpaper with a damp cloth (water only). Excessive liquid is not recommended and may damage the product, but a quick wipe down will keep it looking neat and tidy after application.
Need more design ideas? Check out our other posts on PopTalk! for more inspiration and the latest design updates from us at WallPops. Stay in the know by following us on Instagram @WallPops and by liking us on Facebook!
Ready to get started? Check out our products at WallPops.com

Hannah is the Brand Marketing Manager for WallPops and RoomMates Decor. A dedicated design enthusiast with a passion for creating, her drive to bring ideas to reality never runs dry. In her free time, you will find her painting, spending time with her animals, or curating décor ideas for her dream traditional-styled home. Connect with Hannah through our social channels or here on LinkedIn!